
Hi! I’m Vicki and I’m one of Amanda’s Sewcial Sewists and I contribute makes to The Sewing Girls on Instagram. I have been asked to write something for the Sewcial Studio Blog. What an honour! So, seem as I was already booked on and attending the Jeans making weekend, I thought it would be the ideal opportunity to document my experience of Making Jeans.
I’ve make ‘lots‘ of dresses but don’t really ‘do’ separates. I have made leggings but I haven’t ( asyet) made any sort of trouser with a proper ‘fly’ style zip. So, because it’s good to challenge yourself once in a while (right?!) I decided to sign up to Amanda’s Jeans Workshop.
Most people who know me said ‘Why would you do that, you don’t wear jeans!’ And no I don’t. But is that because I can’t get a pair to fit me? And will I be regretting the idea of a sewing challenge and trying to learn new skills and techniques almost as soon as the workshop starts?!
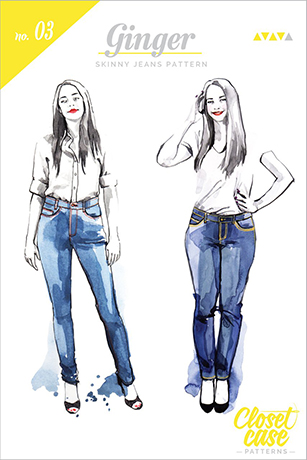
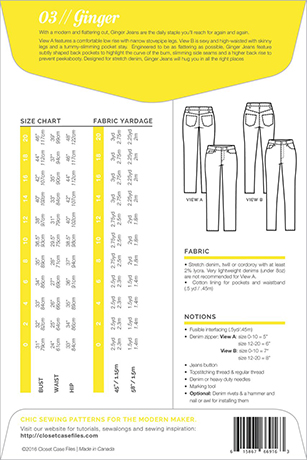
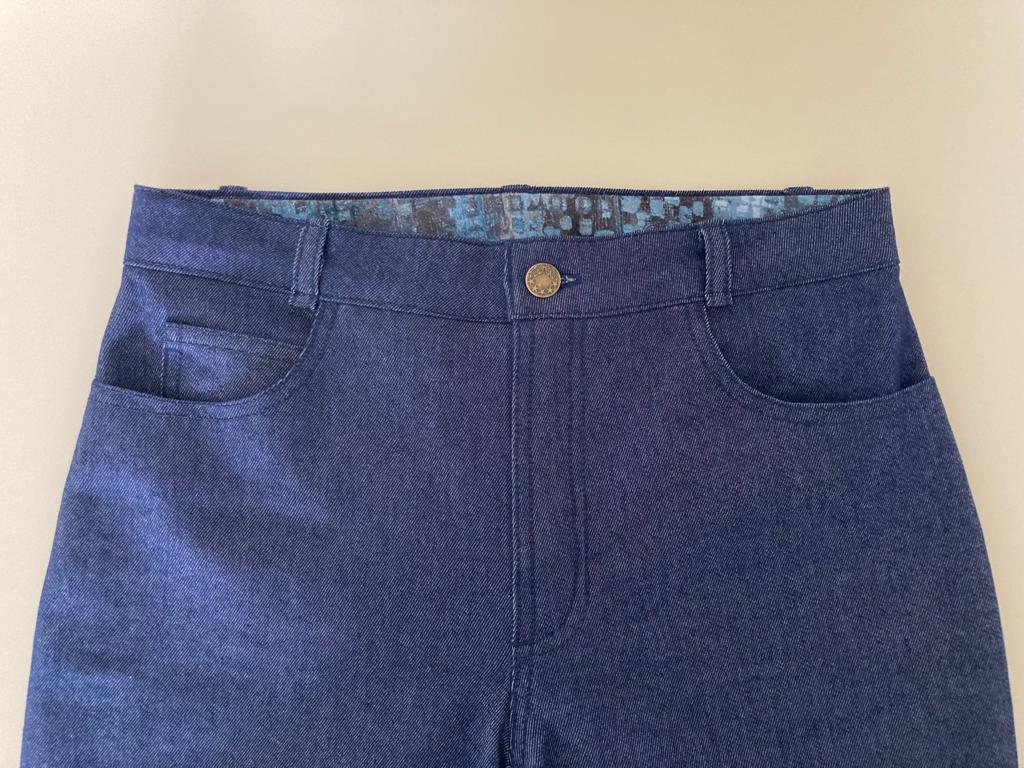
There were three patterns to choose from, which offers attendees a good variety according to our personal preference, body shape and size. I decided to go with the Closet Core Ginger Jeans – view B with a high waist and skinny leg. In the 8 oz Blue Jeans Denim
My waist/hip measurements matched the size 8, so I traced and cut out all the necessary pattern pieces. (Believe me, there’s quite a lot!) I chose a dark blue stretch denim and what I felt was a complementary lining fabric from Amanda’s wonderful patchwork fabric selection. Both of which I washed, dried ( not tumbled as I didn’t want the fabric to twist in any way) and ironed . The night before the workshop I filled a couple of bobbins with thread, packed my bag, made some lunch to take. Phew, I was ready!
The workshop started with a discussion about alterations. I knew I would need to do a sway back adjustment but I also made a flat bottom adjustment, a front rise adjustment and added 1” to the length. As ever Amanda was on hand to advise and check things over.
Interestingly the best way to cut out the pieces required for jeans is to do so on a single layer of fabric. Who knew?! (Not me!)
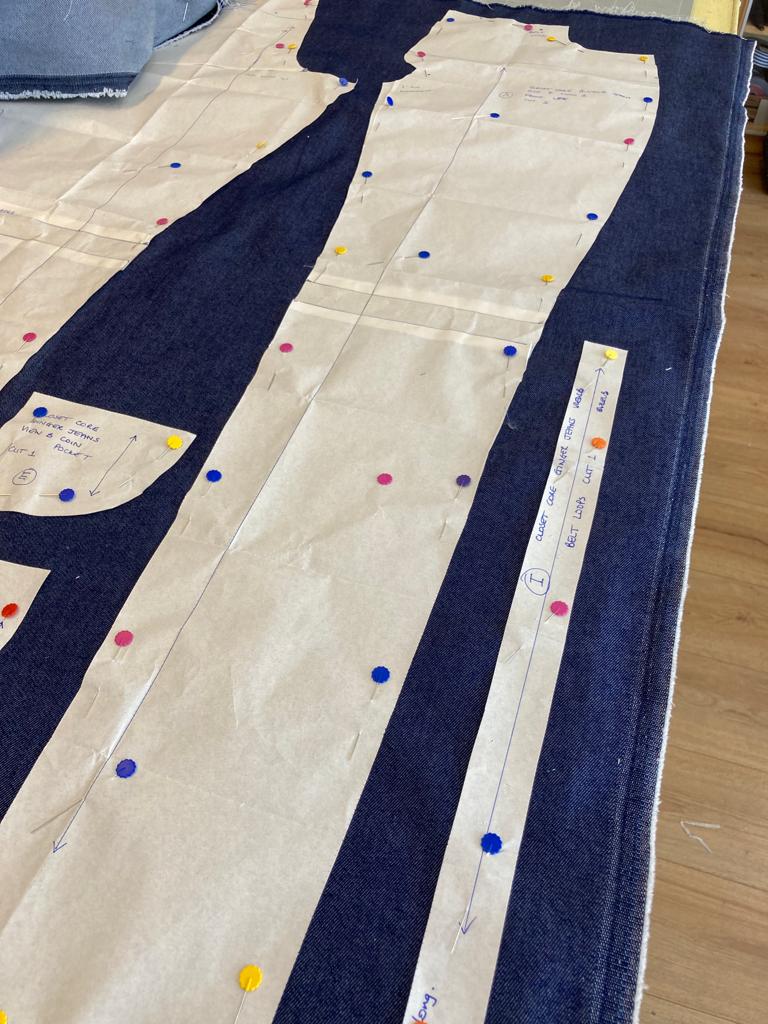
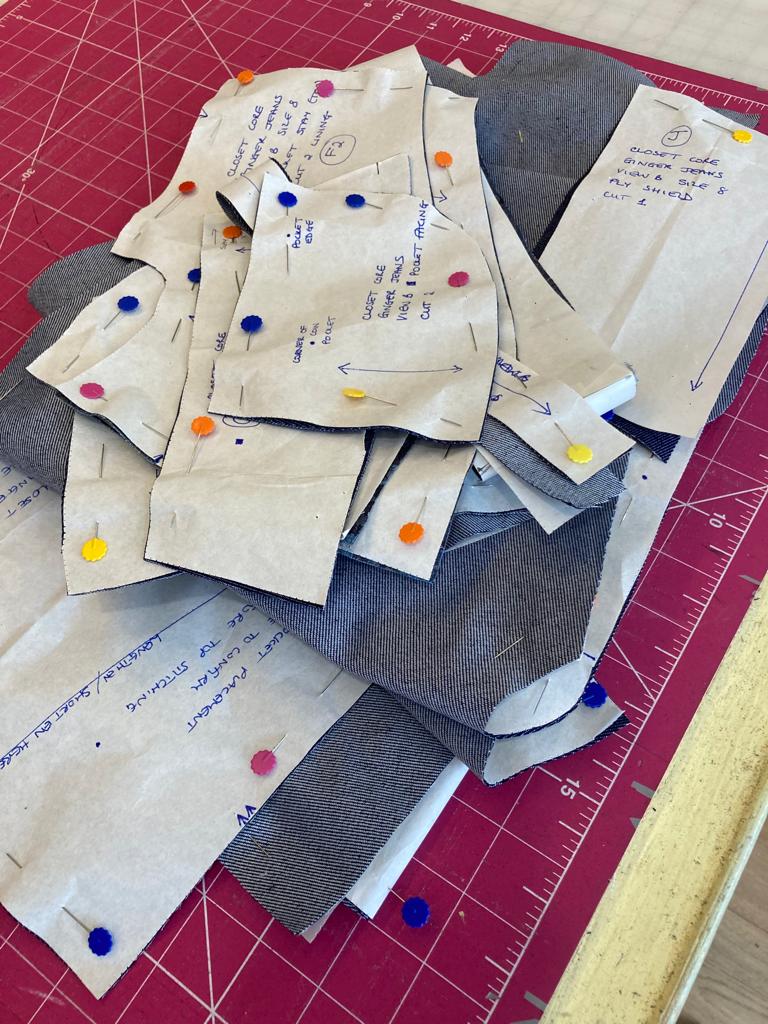
By 13:00 all pattern pieces were cut out of fabric/lining/interfacing as required, notches cut and other markings made as necessary. I think there’s something very satisfying about a pile of pattern pieces all cut out and ready to sew. It’s very calm here…..but then there’s been no sewing as yet!!
Anyway it’s time for lunch. I can cope with that!!
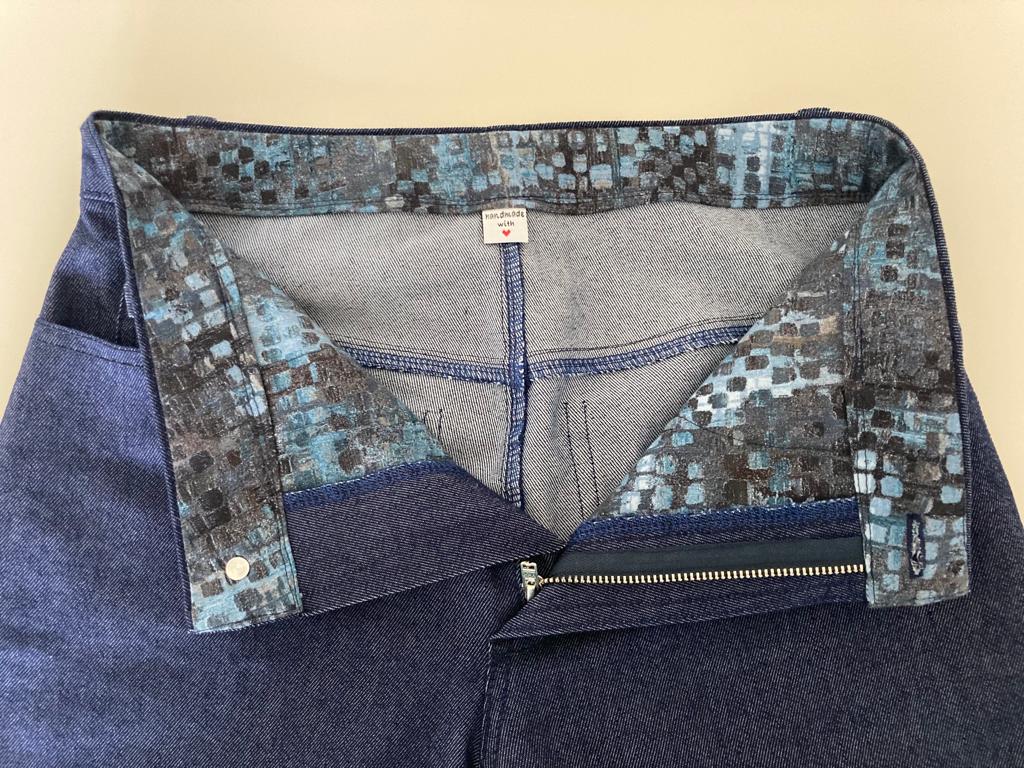
After lunch it went quiet in the studio as everyone needed to concentrate on the task in hand. We started with some top stitching. I found this quite testing. On a side note… the attention to detail at our sewing stations was pretty impressive, we were all equipped with two machines each, loaded with top stich and jeans needles) – one for top-stitch, the other for construction- this in its self, was such a timesaver, retrospectively the thought of rethreading every other seam sends a shudder; there was also a self threading hand needle to sew the loose ends in and a hand made label for the final finishing touch.
I’m a bit of a perfectionist and before starting the workshop I had given myself quite a stern talk to give in to any small imperfections in order to move the project forward in the time given. So I did my very best (as always) and left the odd bit of wavering in my top stitching because really, no-one else is going to notice.
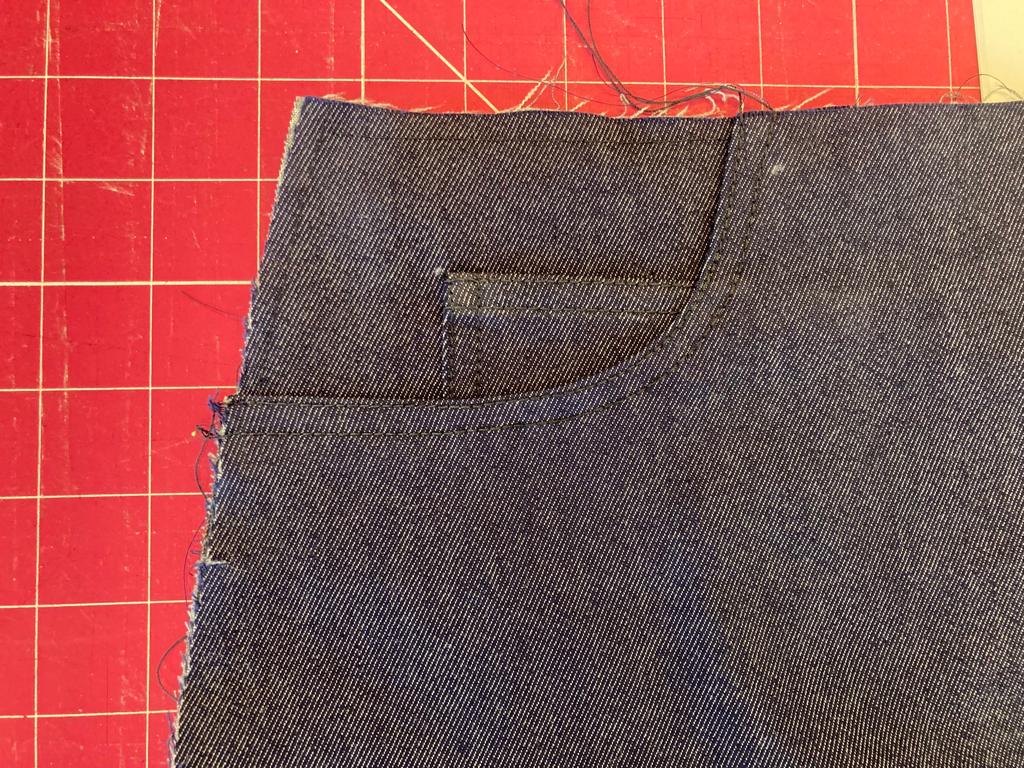
I found it hard to work out which way the front pocket linings went – good job Amanda was available to sort me out!
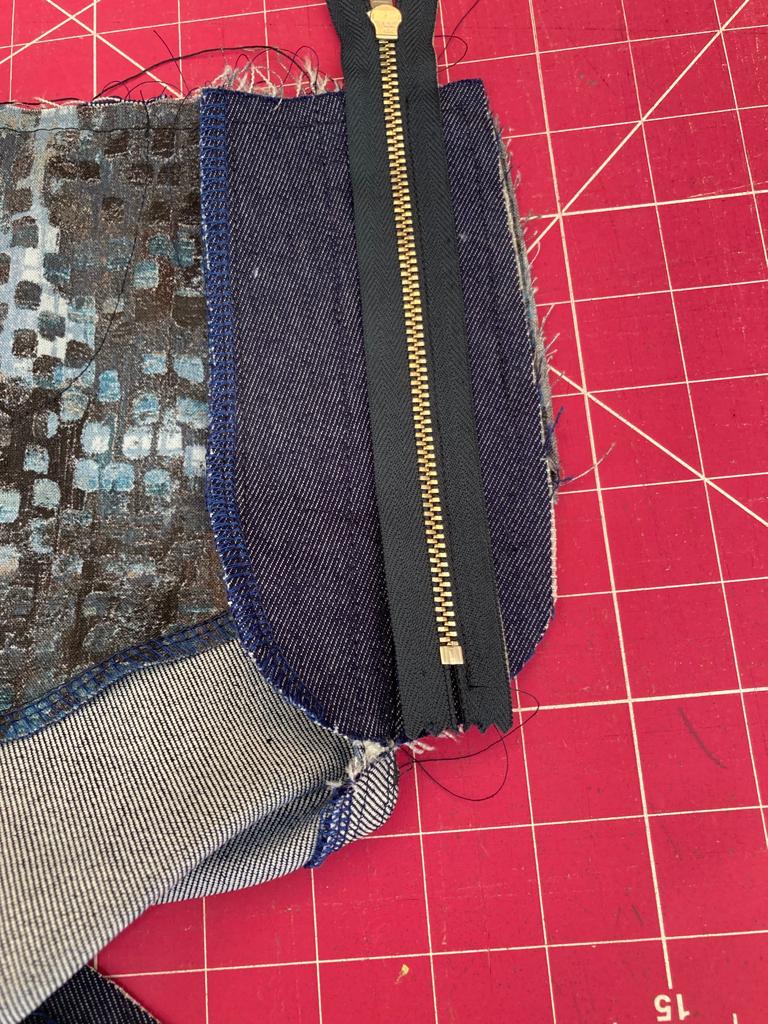
By contrast I found I could follow many of the steps in the construction of the fly zip using the pattern instructions, with Amanda there to double check things for me.
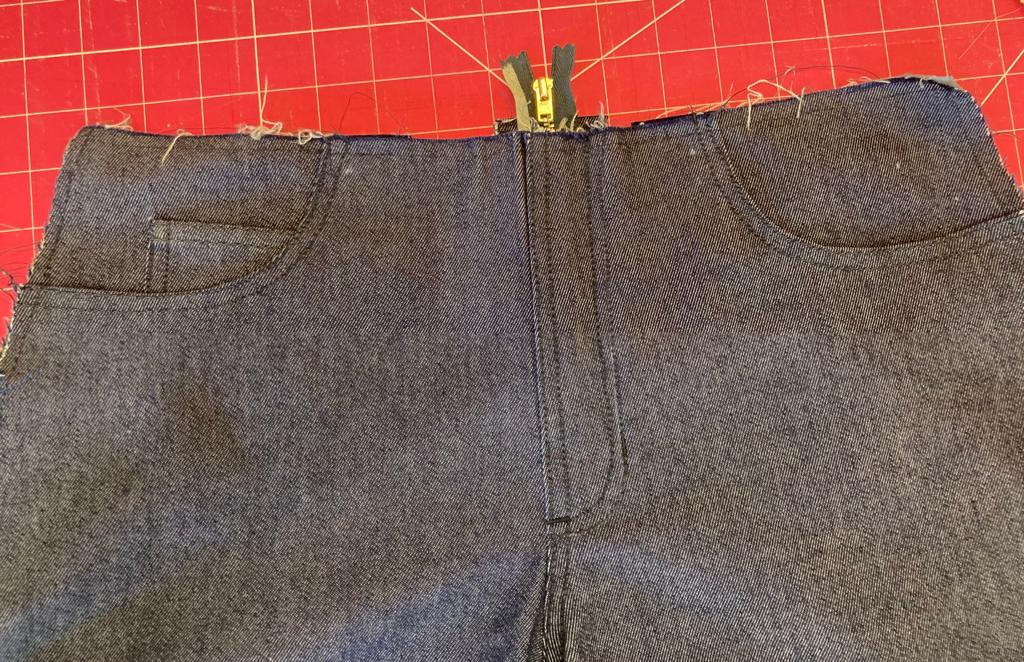
Right at the end of the afternoon I decided to forego putting the rear pockets on in favour of basting the jeans together ready for a try on and fit adjustment tomorrow.
I found the crotch really difficult (not looking forward to the actual sewing). And when the jeans were basted together I had a panic. They looked far too small! I just couldn’t go home and worry about whether I could fit inside them so I tried them on. They were tight on the legs, but I got inside them and eventually zipped them up. The whole putting them on process brought me out in a sweat, however, I could see that they would fit. I might do a slightly smaller seam allowance on the legs….but I will decide that tomorrow. For now, it’s time to go home and drink a glass of wine (or more?!) to celebrate getting this far in the jeans journey!
Day 2
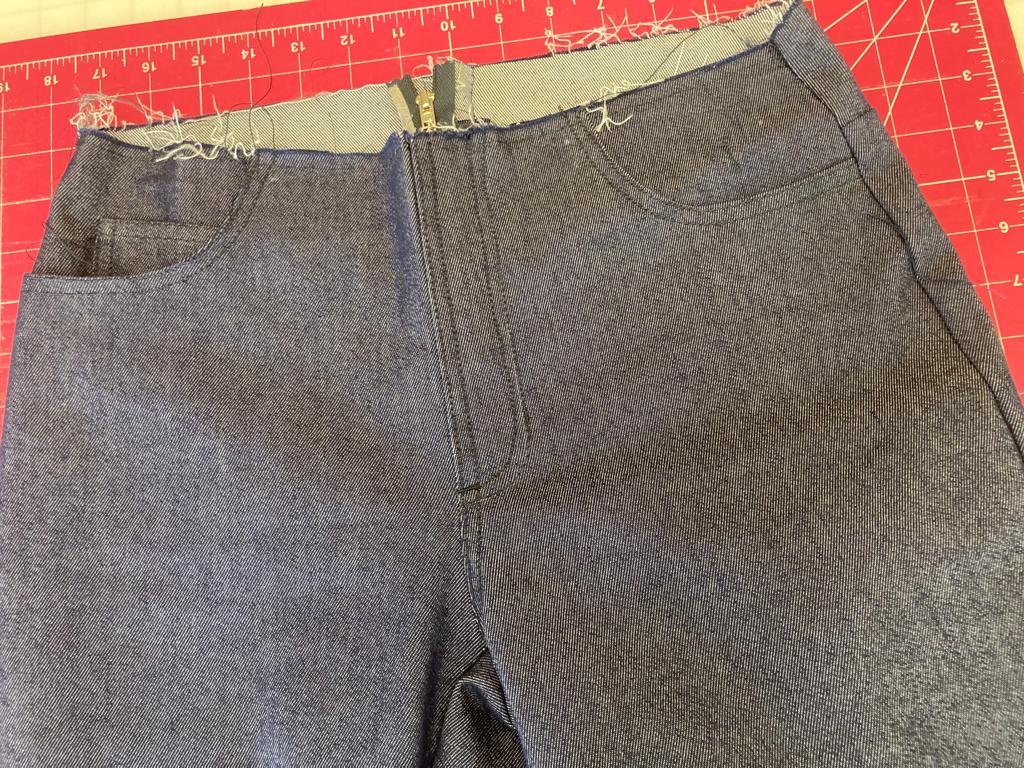
So, day two of the jeans workshop started with a fitting. I felt the legs were a little too skinny so took the basting out and re-basted with a 1/2” seam allowance. With Amanda’s help I also made a small adjustment to the centre back seam near the crotch.
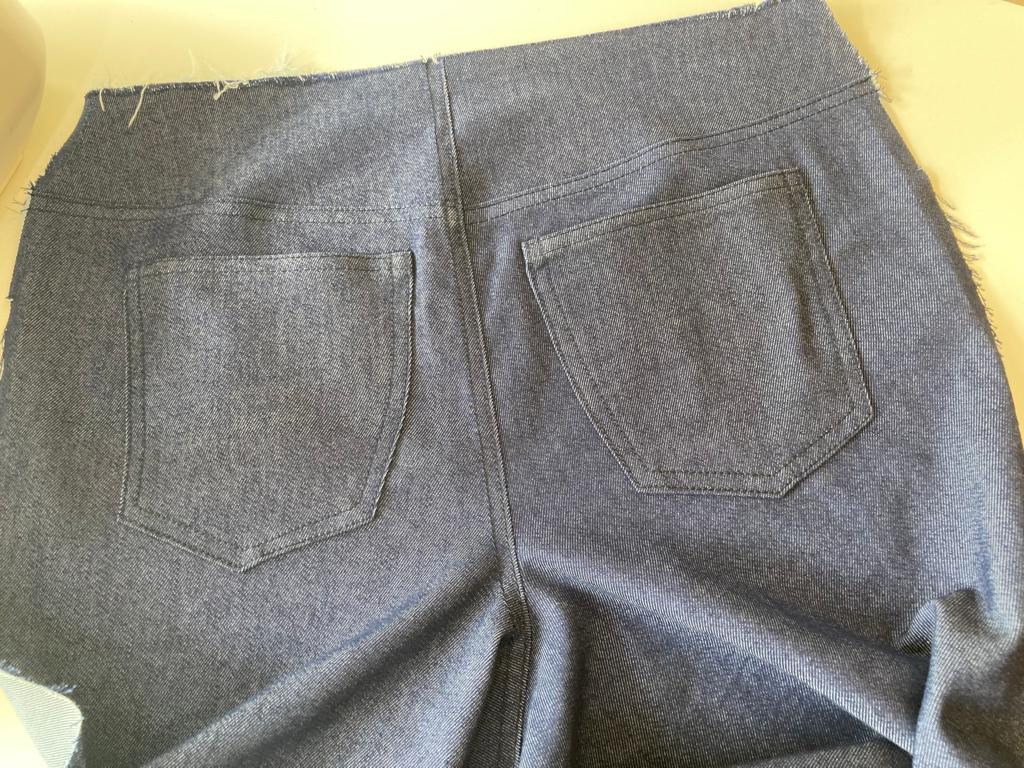
And after all of that I had to take the jeans apart to sew them ‘properly’, starting with the back pockets which I placed very slightly higher than the pattern marking suggested. I just felt that was better for me

Lots of top stitching!! It felt like every seam I did required top stitching! Once the jeans were back together I decided it was time for a lunch break before tackling the waistband.
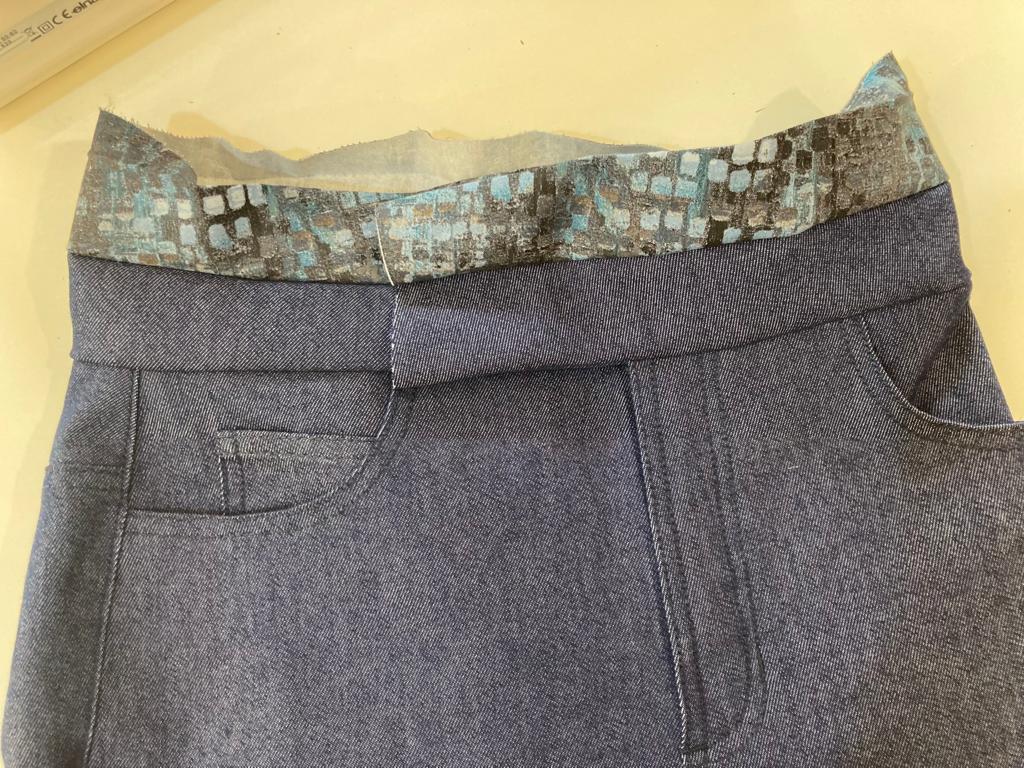
Amazingly the waistband went together well. But it took ages to complete as there are so many things to do, including a whole load of top stitching all around it! And then it was on to the (dreaded as far as I am concerned) buttonhole. There’s quite a lot of bulk and there were some false starts on the practice runs but in the end it got done.
Next there was the huge fun of hammering the back on the stud button! Penultimate step, five belt loops…. I got those in place but ran out of time (and energy) to finish them completely. And there’s still the hems to do. But at the end of the day, I had a ‘try on’ and – hurrah – I am thrilled! I cannot believe I was able to put on an almost completed pair of jeans that I had made myself. I know it sounds obvious but the waistband made a huge difference to the fit, making the jeans high rise and pulling everything in. Huge thanks to Amanda for the tuition, cake and humour!
Monday
Today Monday. I’m going to finish my Ginger Jeans. Firstly I tackle completing the belt loops including neatly and invisibly securing all the thread ends.
Last step – the hems. I lengthened the jeans by 1” but ultimately ended up taking 1/2” off the length then turning up by 5/8” and turning over again by 3/4” which I then top stitched at 5/8”. Lots of numbers there!!
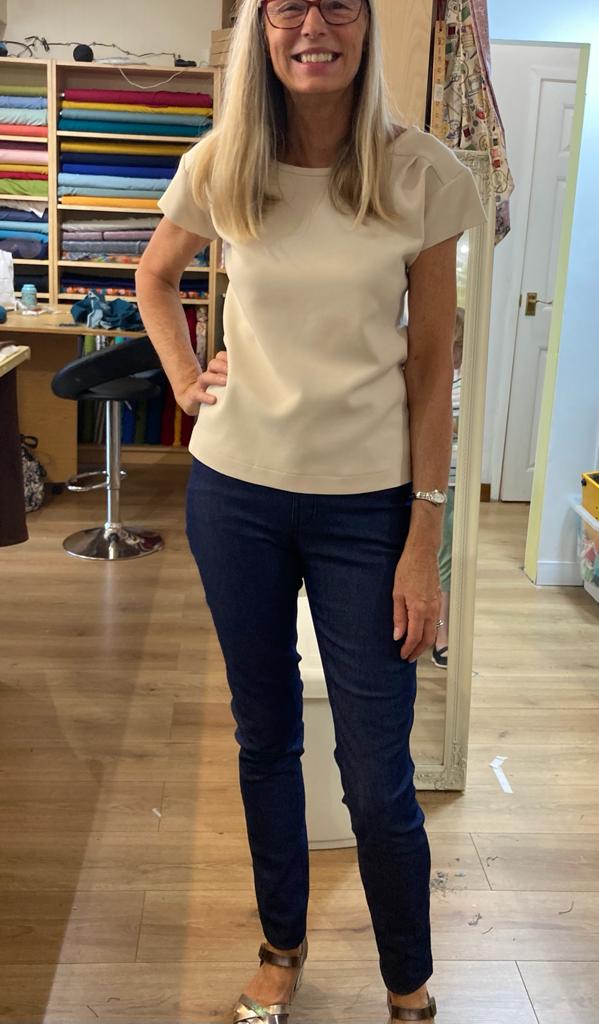
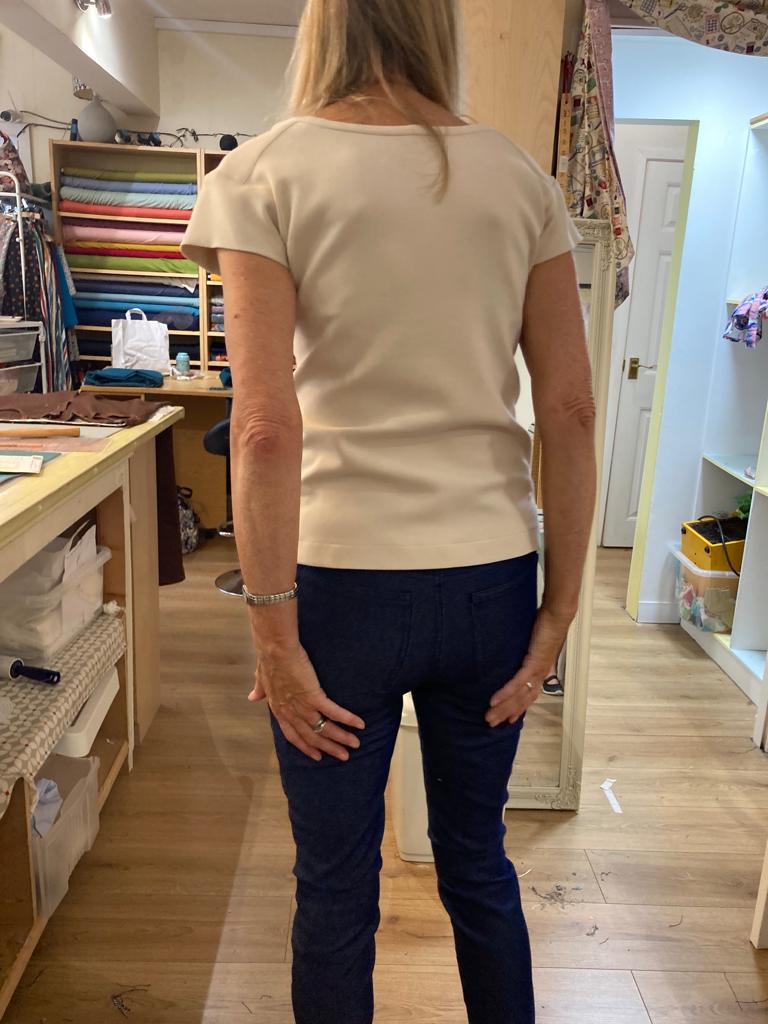
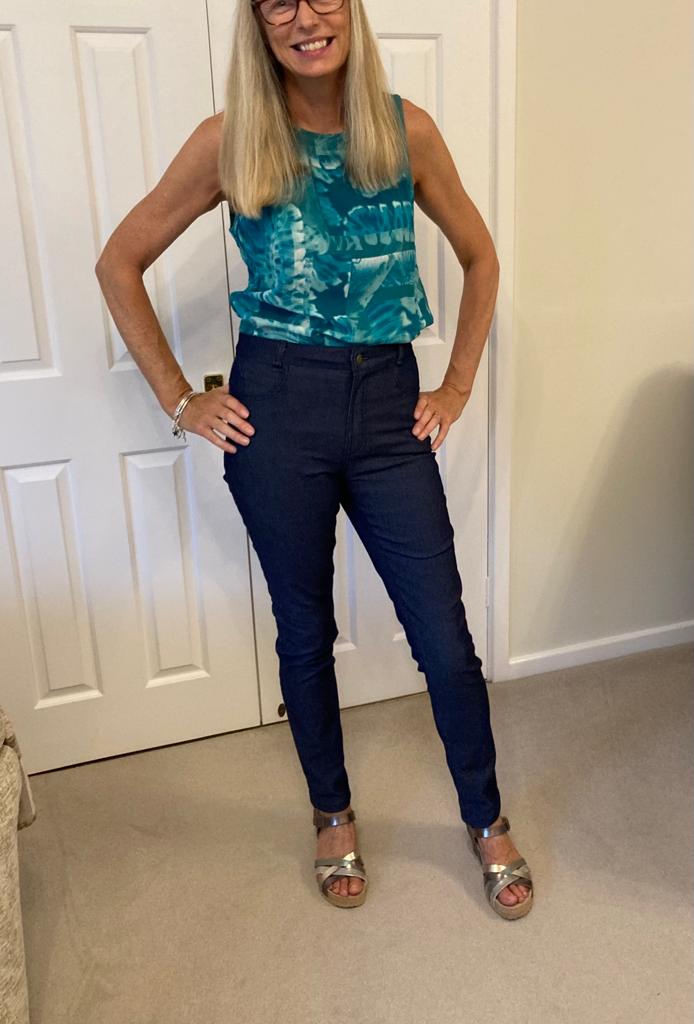
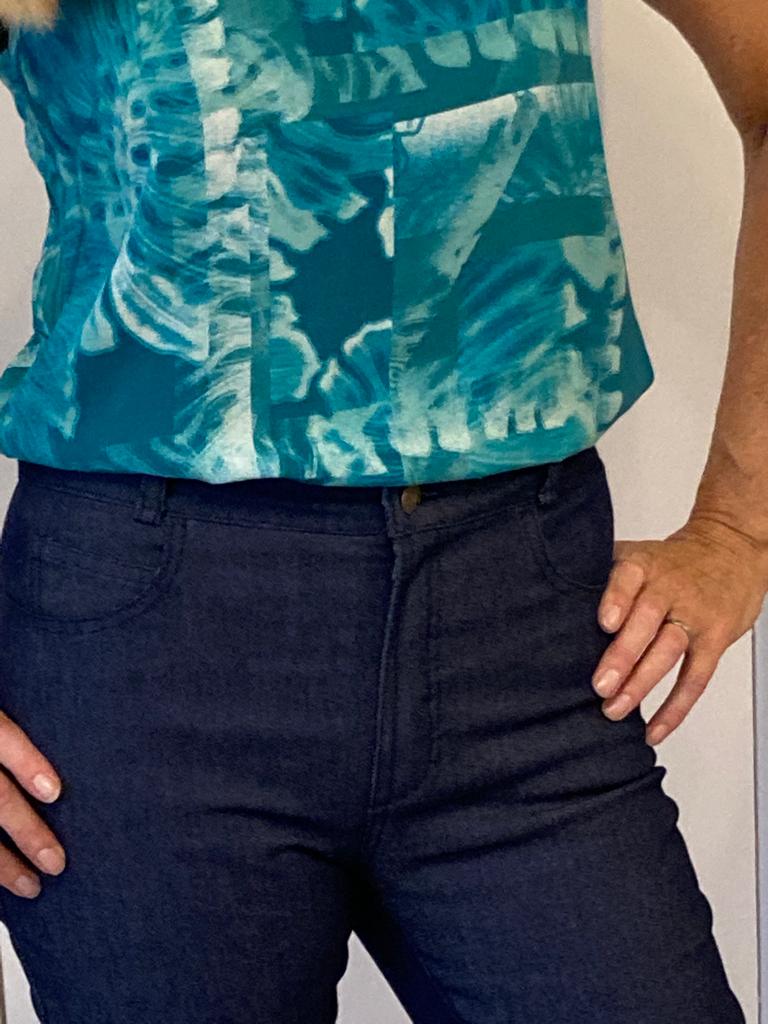
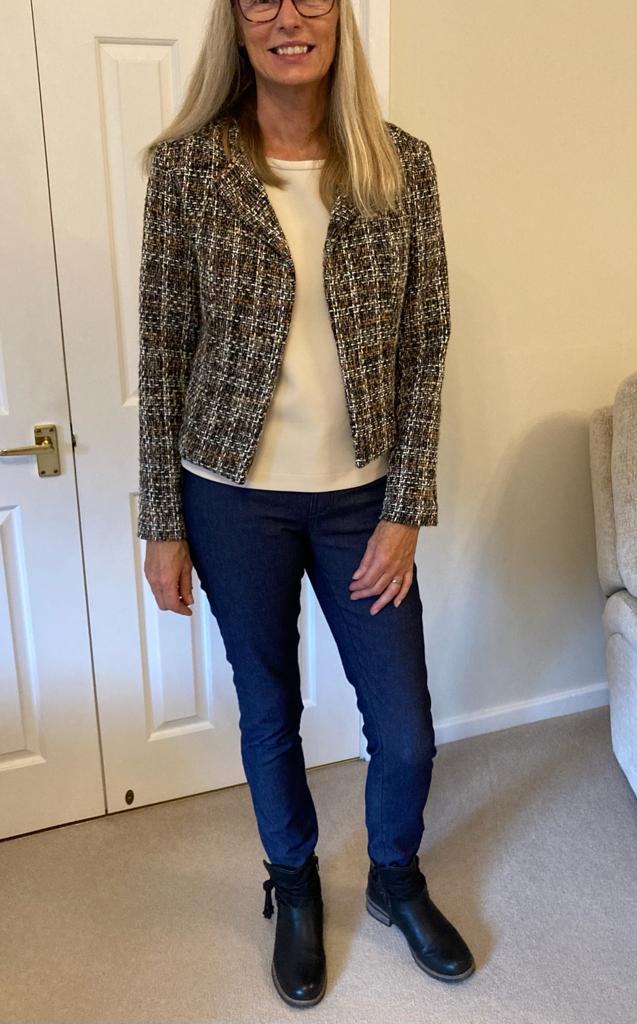
I tried my completed jeans on. I can’t quite believe I’ve actually managed to make a pair of jeans! And that they fit without gaping at the back. Incredible.
Summer and Autumn Styling
Again, I reiterate my thanks to Amanda, You ran an incredible workshop. Thank you. I benefited hugely from your knowledge, experience and help.
Vicki x


