
Ever Fancied making a quilt but thought they looked to hard ? well this disappearing four patch is super beginner friendly and looks really effective. the Lovely Vicki is an avid quilter and has kindly bought you this step by step guide for you to have a go.
You will need
- 100 x 5” squares (to make a 50” [128cm] square quilt)
- 75cm of bolt fabric for the sashing and border
- Wadding
- Backing fabric
- Binding fabric
Notes:
- 30cm of bolt fabric cuts into 16 x 5” squares
- 75m of bolt fabric can be joined to make the backing with the leftover fabric used for the binding, alternatively a wider width fabric can be used such as calico in which case you will also need 60cm of fabric for the binding.
Let’s begin the patchwork
Notes:
- All seams are ¼”
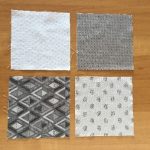
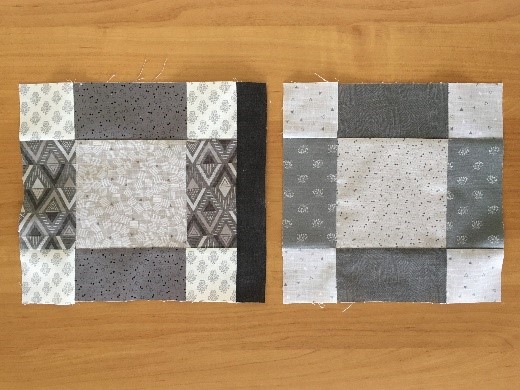
- Choose four 5” squares and sew them together to make a four patch block
|
|
|
|
|
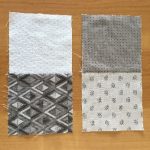
- Cut the block vertically 2½” from the right edge of the block
|
|
|
|
|
Cut here
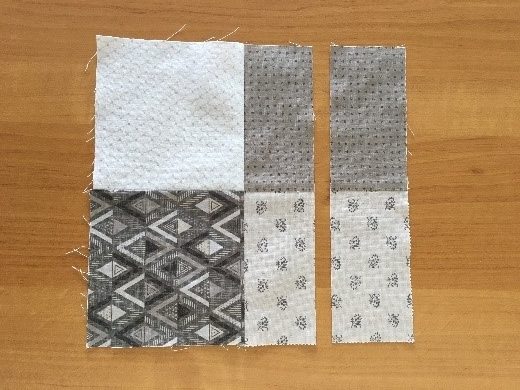
- Sew the cut off piece to the left of the block
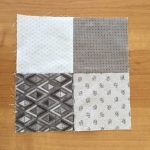
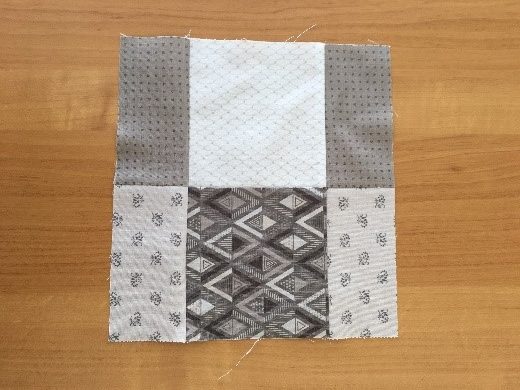 Now cut the block horizontally 2½” from the bottom of the block
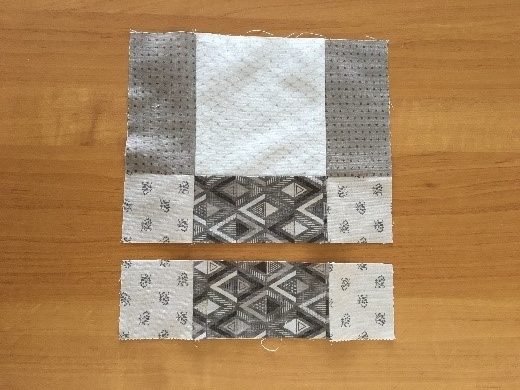
- Sew the cut off piece to the top of the block
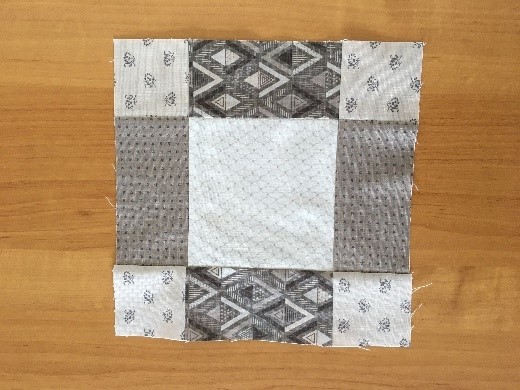 Repeat this process to make a total of 25 blocks
Prepare the sashing:
- Cut 10 width of bolt x 1½” strips of fabric
- Of these cut 5 strips into 9” lengths
- Take one of the remaining long strips and cut it into four equal pieces and sew one of these pieces onto the end of each of the 4 remaining strips
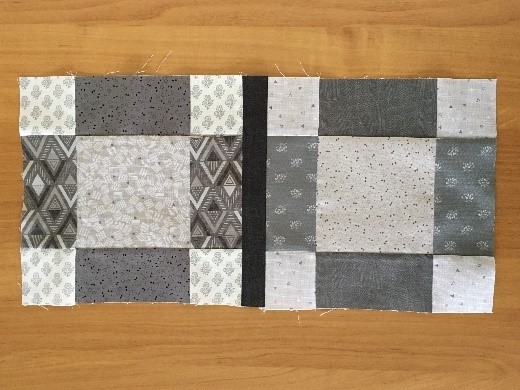
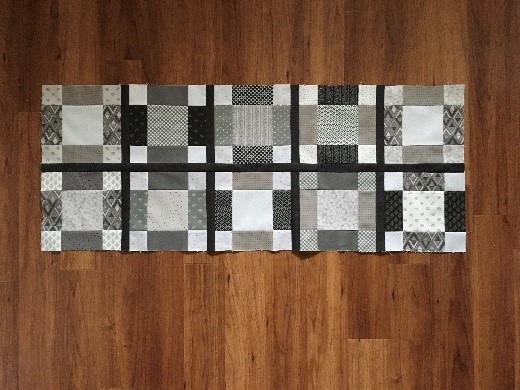
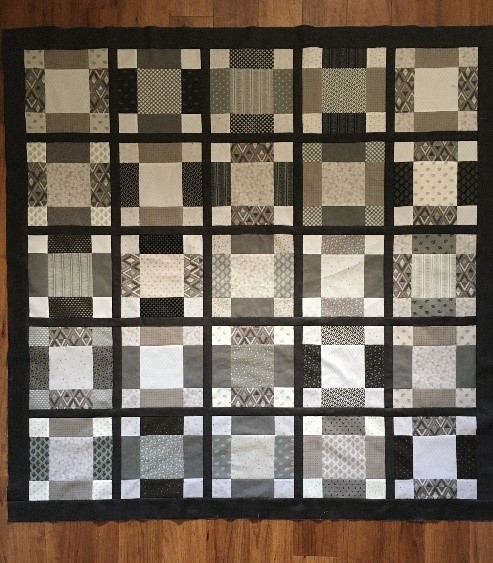
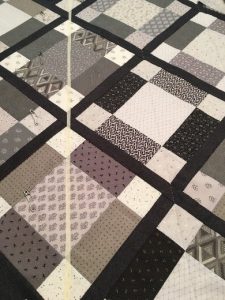
- Arrange your blocks into five rows of five blocks
Hint: if you take a photo of your arrangement on a phone you can rotate the photograph to see the effect from all angles
- Now sash each row as follows:
 Take one of the short pieces of sashing and stitch it to the right hand side of the first block
- Stitch the second block in the row to the other side of the sashing
- Take another piece of sashing and stitch it to the right of the second block
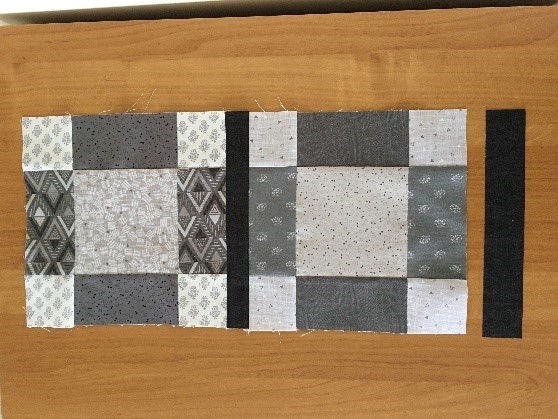
- Then join the third block to the second piece of sashing. Continue in this way to complete the row ending with the fifth block attached to the fourth piece of sashing
- Repeat this process with each row

- Now take one of the long sashing strips and sew it to the bottom of the first row, trim as necessary to fit the row of blocks
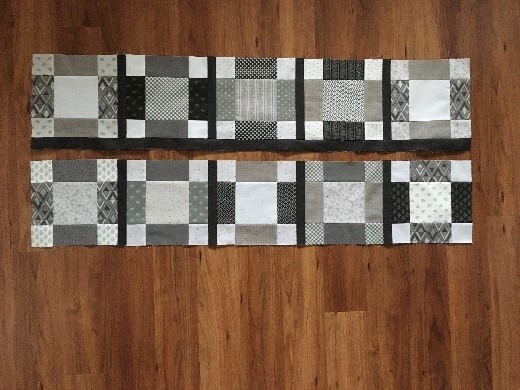
- Sew the second row to the sashing at the bottom of the first row
- Repeat this process with the longer lengths of sashing to join rows 3, 4 and 5
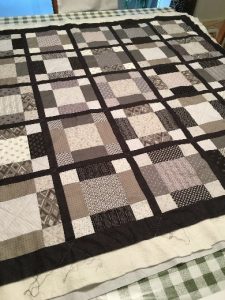
- Prepare the border
- Use the remaining sashing/border fabric to cut 6 width of bolt strips x 2½”
- Cut two of these strips in half
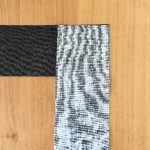
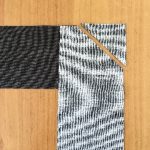
- Join one of the half strips to each of the four full length strips; you can join the strips as a straight seam or a mitred seam (as per photos)

- Now add the borders by sewing a border strip to the sides, trimming off the excess fabric to fit. Next sew border strips to the top and bottom, again trimming the fabric to fit
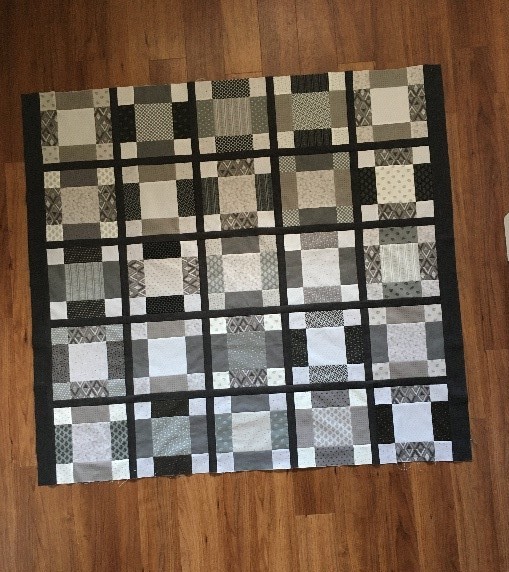
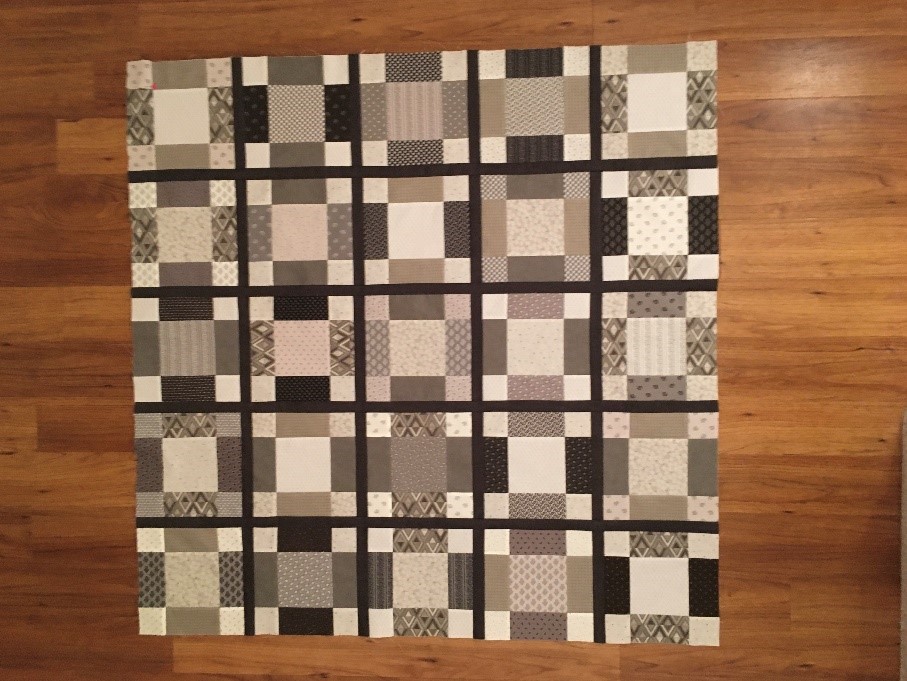
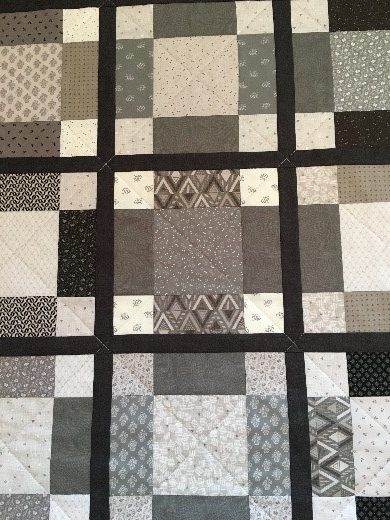
- Stand back and admire your patchwork which is now complete!
And so, after a breather, on to the quilting
Notes:
- There are lots of really helpful tutorials (written and video format) on the internet which cover quilting and binding in detail
- If you are using bolt fabric you will need to cut it in half and join it
- Cut your wadding so that it is slightly bigger than the patchwork – beginner quilters give yourself more to play with – at least 4” bigger than the patchwork all round
- Cut your backing fabric very slightly bigger than the wadding (if you have joined your fabric place the seam in the centre)
- Make a ‘quilt sandwich’ as follows:
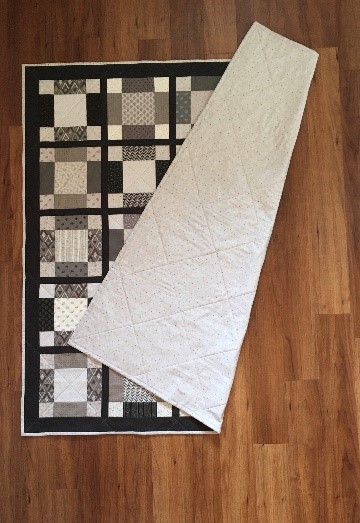
- Iron everything – patchwork, backing and (on a lower heat) the wadding
- On a flat surface place your backing fabric right side down, make sure it is smooth
- Place your wadding on top of the backing fabric and again, make sure it is smooth
- Place the patchwork on top of the wadding, make sure everything is smooth
- Decide how you will be quilting because this can be taken into account when you baste the layers together; baste the layers using curved basting pins or by tacking
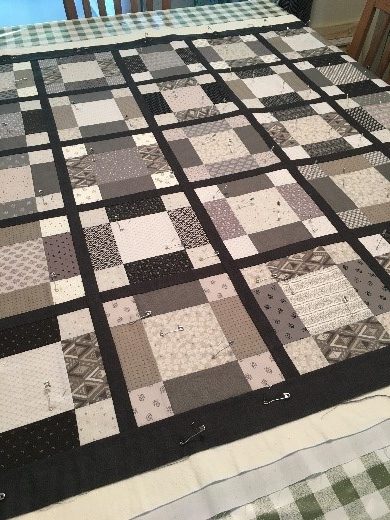
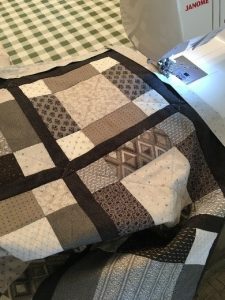
- Go ahead and quilt in your chosen design!
Hint:
- If you have one, use a walking foot (aka an even feed foot)
- Experiment with stitch length on some spare fabric/wadding layers, the quilt in the photographs was stitched on a 3.5 stitch length
- If you are not ‘quilting in the ditch’ you can mark your quilting lines with a low tack masking tape (line it up so you stitch next to the edge) or you can draw the lines with a fine fabric marking pencil – but do check on some scrap fabric that this will not show
- Always quilt from the centre and work out
The final stretch – binding
Notes:
- Again, there are lots of really helpful tutorials on the internet to help with binding including how to go round the corners!
- All seams are ¼”
- Trim all the excess binding and backing fabric from your quilt
- From your binding fabric cut 8 x width of bolt 2½” strips of fabric and join them to make the binding (mitred joins spread the bulk of the seam allowance out but you can get away with straight joins)
- Iron the binding in half lengthways, wrong sides together
- Sew the binding onto the right side of the quilt (all raw edges together)

- Iron the binding edge and pin to the back of the quilt, hand sew the binding on the back of the quilt (this is quite a relaxing task with the TV on or some music in the background)
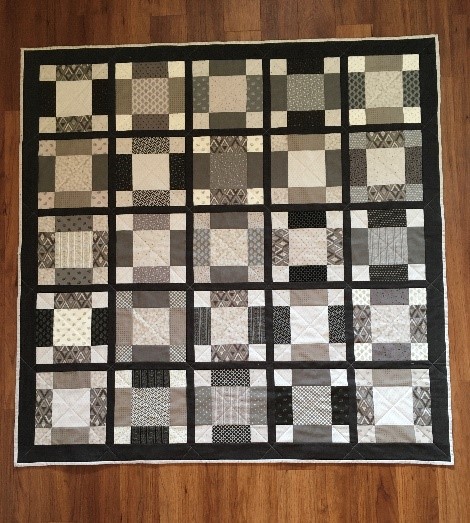
- Et voila! Step back and admire your quilt!
Food for thought
It can be difficult to choose fabrics online so If you choose a ‘collection’ of fabrics you know they have been designed to go together.
The lovely Amanda at The Sewcial Studio is always on hand to offer help and advice (at the present time email or telephone and leave a message).
The quilt in the photographs was made using one charm pack Moda Farmhouse Gatherings and bolt fabric from the Northcott Cosmo Urban Mist collection (available from The Sewcial Studio)
Making just 16 blocks (4 rows of w blocks) would allow the use of bolt fabric for the backing, try using 64 squares from two charm packs for a really random effect.
Or limit yourself to just two or three colours: Just have fun!


